Avoid your inquiry is delay response, please enter your WhatsApp/Skype along with the message, so we can contact you at the very first time.
We will reply you within 24 hours. If for urgent case, please add WhatsApp/WeChat: +8615063007107,. Or call 0086-15063007107 directly.
A poorly prepared cabinet can leave a granite slab uneven, unsupported, or at risk of cracking. Because stone does not bend like laminate, small cabinet problems can become costly installation failures. Proper leveling, support, adhesive placement, and professional handling create a safe, lasting result.
Yes, granite is usually secured to cabinets with small amounts of silicone or another approved adhesive. However, the adhesive does not carry the full weight. Granite countertops mainly rest on level cabinet frames, plywood substrates, or approved support structures. Brackets, corbels, and extra framing may also be required around overhangs, seams, sinks, and unsupported spans.
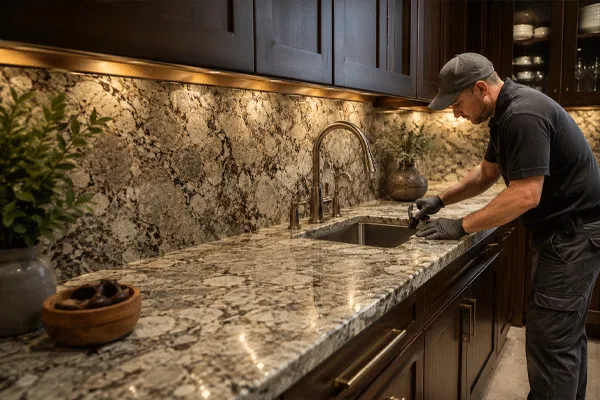
Is Granite Glued to Cabinets? How Granite Countertops Are Installed
This guide explains:
Granite countertops are normally attached to the cabinet with small dabs or beads of flexible adhesive, often silicone. The adhesive helps keep the countertop in place and reduces movement between the underside of the stone and the top of the cabinets.
However, saying that granite is “glued to the cabinets” can create the wrong idea. The adhesive does not suspend the stone or carry all its weight. The cabinet structure supports the slab. The stone’s own weight, the level cabinet surface, the adhesive, the seams, and any required brackets work together.
A granite worktop installation guide from Howdens instructs installers to use clear silicone on the front cabinet rails and to confirm that the worktops are level before final fitting. This reflects a common professional approach: the stone rests on a prepared support and silicone helps secure it.
Granite countertops are not normally screwed directly through the stone and into the cabinet in the way some laminate countertops are installed. Drilling mechanical fasteners through the finished slab could create stress points and damage the stone.
The basic installation arrangement is:
Granite slab
──────────────
Flexible adhesive or silicone
•     •     •
Level cabinet rails or substrate
══════════════
Base cabinet structure
│            │
│            │
For large developments and repeated housing units, our custom granite countertop fabrication service can prepare numbered pieces, sink openings, edge profiles, shop drawings, and organized packaging for installation teams.
In many installations, countertops sit directly on cabinets, especially when a thicker slab is used and the cabinet boxes provide continuous, level support. The stone rests on the top rails, cabinet sides, or a full perimeter support system.
The final method depends on:
A common 3 cm granite slab can often sit on level base cabinets without a full plywood deck. A thinner 2 cm slab commonly receives plywood or another approved substrate for added support. MSI notes that 2 cm granite is typically installed with plywood reinforcement underneath, while regional practices may differ.
The phrase “countertops do sit directly on cabinets” does not mean that installers can place stone on any cabinet surface. The cabinet must be strong, secure, flat, and properly aligned.
The top of the cabinets becomes the foundation for the granite. If that foundation moves, twists, or drops, the rigid countertop material may crack or open at a seam.
Granite does not flex in the same way as wood or laminate. It is strong under compression, but it can crack when part of the slab lacks support or receives concentrated stress.
Before placing the granite, installers check that the cabinets are level from front to back and from side to side. They also check the entire run so one cabinet does not sit higher than the next.
Natural Stone Institute materials cover cabinet and substrate requirements, spans, cantilevers, seams, sink mounts, adhesives, tolerances, and other details that affect natural stone countertop installation.
A successful installation requires:
Uneven cabinets can create several problems:
| Cabinet problem | Possible countertop result |
|---|---|
| One cabinet is too high | Slab rocks or receives a pressure point |
| Cabinet run slopes | Countertop is visibly uneven |
| Front rail is loose | Edge support becomes unstable |
| Gap under the slab | Local stress and possible cracking |
| Corner cabinet is twisted | Seam alignment becomes difficult |
| Sink cabinet is weak | Cutout area may flex or fail |
The installer may use a suitable shim to correct a small difference. Yet random shimming under isolated parts of the slab is not a substitute for ensuring that the cabinets are properly installed.
The best practice is to correct the cabinet structure first. The stone installation team should not be expected to repair major cabinet construction problems after the granite slab arrives.
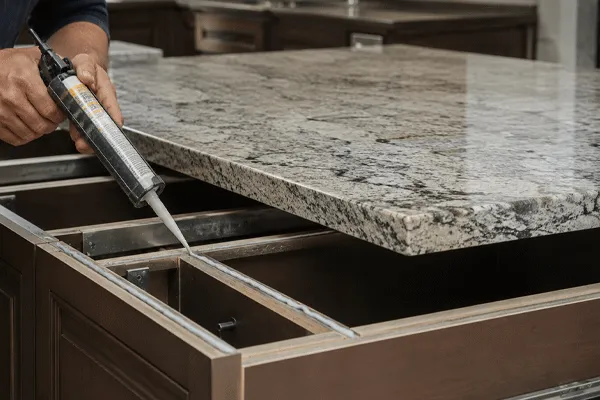
Professional installers commonly use flexible, stone-compatible silicone or another adhesive approved by the fabricator. The product is normally applied in controlled dabs or short beads rather than as one thick, continuous layer.
A flexible adhesive can accommodate small amounts of movement caused by temperature change, normal building settlement, or differences between wood cabinetry and natural stone.
The adhesive serves several purposes:
Installers may use different products in different parts of the installation:
| Installation area | Common material |
|---|---|
| Stone to cabinet rail | Flexible silicone or approved adhesive |
| Stone seam | Color-matched stone epoxy |
| Countertop to wall | Flexible silicone sealant |
| Backsplash joint | Stone-safe silicone |
| Reinforcement | Epoxy and approved reinforcement system |
| Undermount sink | Sink mounting system plus sealant |
Silicone used between the slab and cabinet should not be confused with seam adhesive. Where two granite pieces meet, the installation team normally uses a color-matched epoxy or professional seam material to align and join the pieces.
Installers should also avoid using an adhesive that can stain the underside of the stone. Some light-colored natural stone materials can absorb oils or chemicals from an unsuitable product.
As a professional stone manufacturer and supplier, we recommend that buyers confirm the adhesive system with the fabricator before installation, especially for white granite, marble countertops, translucent stone, and resin-treated slabs.
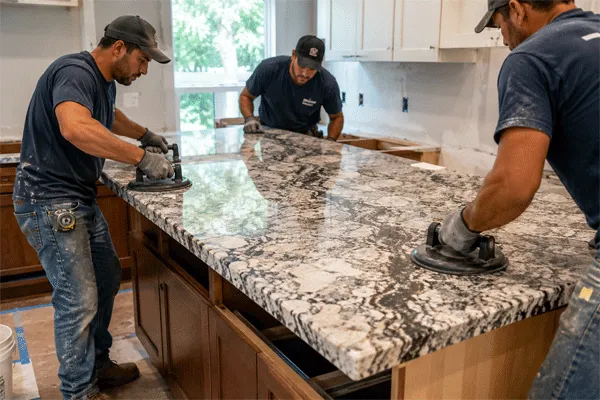
Is Granite Glued to Cabinets? How Granite Countertops Are Installed
Plywood is not required under every granite countertop. The need depends mainly on slab thickness, cabinet design, edge style, span, and fabricator instructions.
A 2 cm slab is thinner and may require plywood to provide a continuous support surface. A 3 cm granite slab is thicker and may be installed directly on well-built cabinets in many markets.
MSI’s installation information explains that 2 cm granite commonly uses a plywood substrate for added strength and flexibility. Its granite installation guidance also describes cutting the plywood to match the countertop template, placing it on the cabinets, checking that it is level, and fastening it to the cabinet structure.
| Countertop construction | Common support approach |
|---|---|
| 2 cm granite | Plywood or approved substrate often used |
| 3 cm granite | May sit directly on level cabinet rails |
| Laminated stone edge | Substrate may be hidden behind built-up edge |
| Large unsupported span | Steel, plywood, or structural support may be required |
| Heavy sink opening | Independent sink support may be needed |
| Long island overhang | Brackets or steel support may be required |
The plywood must be flat, dry, stable, and suitable for the installation. Poor-quality or warped plywood can create the same problems as uneven cabinets.
Plywood should also be sized so it does not remain visibly exposed beneath the finished edge. A laminated or built-up edge may hide the substrate and make a thinner slab appear thicker.
For bulk commercial work, our cut-to-size granite slab and fabrication solutions can be coordinated with the required slab thickness, edge build-up, cabinet details, and substrate plan.
Granite is heavy. A standard 3 cm granite countertop may weigh around 19 pounds per square foot, although the exact figure varies with stone density and thickness. Large full slabs may weigh several hundred pounds.
For example, a countertop area of 50 square feet made from 3 cm granite may place roughly 950 pounds of stone across the cabinet structure before adding sinks, appliances, backsplashes, or people leaning on the overhang.
That does not mean each cabinet carries the entire load. Properly installed kitchen cabinets distribute the weight through cabinet sides, rails, bases, fasteners, and the floor.
Still, the condition of the cabinets matters. Weak particleboard, water damage, loose joints, missing backs, or poorly connected cabinet boxes may not provide a reliable base.
Before installing new countertops, the project team should confirm:
The weight of granite is one reason professional handling matters. Granite installers use lifting tools, support frames, carrying clamps, and trained teams to reduce breakage and injury risk.
Not every countertop area receives full support from a cabinet. Breakfast bars, islands, peninsulas, desks, pass-through counters, and seating areas may extend beyond the cabinet face.
A short overhang may be supported by the strength and depth of the slab. A longer overhang generally requires a bracket, corbel, leg, hidden steel plate, or engineered frame.
Natural Stone Institute guidance addresses countertop overhang support and notes the use of corbels for larger unsupported overhangs. The Institute’s resource library references a 10-inch threshold in its technical discussion, although the final support design should always follow the current manual, stone type, thickness, and project conditions.
Additional support may be needed around:
| Condition | Possible support requirement |
|---|---|
| Slab fully supported by cabinet walls | Adhesive may be sufficient |
| Small standard front overhang | Often no visible bracket |
| Deep seating overhang | Brackets, corbels, or steel support |
| Span over a dishwasher | Side support or structural rail |
| Large undermount sink | Independent sink support |
| Seam above open space | Relocate seam or add support |
| Thin stone slab | Plywood or engineered substrate |
| Heavy decorative edge | Review support and cabinet strength |
The correct support should be installed before the final slab placement whenever possible. Adding visible brackets after a countertop begins to sag is not a good installation plan.
A large kitchen may require more than one granite slab. Slab dimensions, cabinet layout, access routes, pattern direction, sink position, and transportation limits all affect seam placement.
During granite countertop installation, the installers first dry-fit the pieces. They check the wall fit, overhang, cabinet contact, pattern movement, and seam alignment.
They then use a stone-compatible, color-matched epoxy to join the pieces. Professional seam-setting tools may pull the slabs together and help keep the two surfaces aligned while the epoxy cures.
A good seam should be:
The seam should normally rest above cabinet support rather than across a large unsupported gap. Sink and cooktop openings can reduce the strength of nearby stone, so the fabricator must plan the seam and cutouts together.
Natural stone fabrication and installation guidance treats seam placement, spans, cutouts, support, and joint materials as connected design issues rather than separate details.
An undermount sink hangs below the granite countertop. It should not depend only on a bead of adhesive for long-term support, especially when the sink is large, heavy, or filled with water.
A proper installation may use:
The sink mounting system should transfer the load to the cabinet or structural support. Silicone seals the joint between the sink rim and the underside of the stone, but it should not be assumed to carry the entire sink weight forever.
The granite around an undermount sink is also weaker because the large cutout removes material from the slab. Narrow rails in front of or behind the sink require careful handling, reinforcement, and full support during transportation and installation.
The cabinet installer, countertop fabricator, plumber, and sink supplier should agree on responsibilities before installation day. Otherwise, each party may assume that another contractor will provide the support.
Granite can sometimes be installed on old cabinets, but the age of the cabinets is less important than their condition.
An existing cabinet may be suitable when it is:
Older cabinets may need repair, reinforcement, or new leveling work before the countertop template is made.
Pay special attention to:
Installing countertops on old cabinets without checking these issues can transfer hidden problems into the new stone.
A previous laminate top may have hidden uneven cabinets because laminate can flex or because the old top included a thick wood substrate. Granite doesn’t bend to follow the same irregular surface.
Before ordering new granite countertops, have the cabinet contractor and stone fabricator inspect the base. Reinforcing the cabinet before templating is usually easier and less expensive than changing it after fabrication.
Is Granite Glued to Cabinets? How Granite Countertops Are Installed
Granite, quartz, and laminate countertops may share a similar shape, but their materials and installation methods differ.
| Feature | Granite | Quartz | Laminate |
|---|---|---|---|
| Material | Natural stone | Engineered mineral-resin slab | Decorative surface over wood core |
| Flexibility | Low | Low | Higher |
| Typical weight | Heavy | Heavy | Relatively light |
| Cabinet leveling | Critical | Critical | Important |
| Direct screws through top | Not typical | Not typical | Often possible from below |
| Seam material | Stone epoxy | Manufacturer-approved adhesive | Mechanical joint and adhesive |
| Plywood requirement | Depends on thickness | Depends on product | Built into countertop structure |
| Heat response | Strong, but thermal shock remains possible | Resin can be heat-sensitive | More heat-sensitive |
| Natural variation | Yes | More controlled | Printed pattern |
Quartz countertops are also usually supported by level cabinets and secured with controlled dabs of flexible silicone. MSI’s quartz installation instructions call for flat support and flexible silicone rather than mechanical fasteners through the slab.
Granite and quartz are both rigid. Neither should be forced onto an uneven cabinet surface.
Laminate countertops are much lighter. Installers may secure them by driving screws from cabinet corner blocks into the wood-based underside. That method does not apply to a solid granite slab.
Buyers comparing granite or quartz can review our engineered quartz countertop options for projects that require more uniform color and pattern.
Understanding the installation process helps contractors and property owners prepare the site and avoid delays.
The installation team checks the base cabinets, islands, support rails, walls, and access route. The cabinets should be finished, fixed, and level before the final template.
The fabricator measures walls, cabinet runs, sink locations, cooktop openings, overhangs, and seam positions. Changes after templating may cause the finished slab not to fit.
The fabricator places the countertop shapes over slab images or marks them directly on the stone. This controls color flow, veins, natural features, and cutting yield.
The factory cuts the slab, makes openings, shapes edges, polishes exposed surfaces, adds reinforcement where needed, and checks dimensions.
Before installation, the project team disconnects plumbing and removes existing countertops when required. Appliances, sinks, faucets, and cabinets must match the approved template.
The installation team carefully places each piece onto the cabinets without final adhesive. The installers check wall gaps, overhangs, seams, cutouts, and level.
Small adjustments may be made with suitable shims. Major cabinet problems should be corrected before the stone is permanently attached.
The installers apply controlled amounts of silicone or approved adhesive to the cabinet support points and lower the countertop in place.
Color-matched epoxy is placed at seams. The pieces are aligned and held until the joint is stable.
The sink support, sealing, backsplash, and wall joints are completed according to the project scope.
Professional granite countertop installation is valuable because stone pieces are heavy, rigid, expensive, and difficult to modify on site.
A small prefabricated vanity top may be suitable for an experienced DIY user. A full kitchen made from multiple granite slabs is different.
DIY granite work can involve:
A granite slab may look strong while lying flat, but it can crack when carried incorrectly or twisted through a doorway.
DIY granite installation may also create expensive errors:
Professional installation does not remove every risk, but an experienced fabricator and installation team can manage the weight, seams, support, adhesives, and final fit more reliably.
For commercial projects, expert installation and documented quality checks are even more important because one repeated error may affect dozens of rooms.
A contractor should confirm the installation requirements before approving mass fabrication.
Use a project checklist covering:
A residential development requires 180 kitchen countertops. The developer plans to install granite on cabinet packages supplied by three subcontractors.
During the first sample-unit inspection, the stone team finds that one cabinet run is level, one is slightly twisted, and the third lacks support above the dishwasher opening.
Instead of beginning mass installation, the project team establishes one preparation standard:
This process prevents cabinet variations from creating repeated stone failures. It also reduces disputes between cabinet installers, granite installers, plumbers, and the general contractor.
Maintaining your granite countertops does not require a complex routine. The main goal is to protect the surface, seams, edges, and cabinet structure.
Clean the countertop with:
Avoid:
Granite is a porous natural material to varying degrees. Some dense granites absorb very little liquid, while other materials benefit from a suitable impregnating sealer.
Also watch the cabinets below. A leaking sink, dishwasher, or faucet can damage the cabinet foundation even when the granite remains unchanged. Swollen cabinet material may eventually affect support.
Inspect these areas from time to time:
A well-maintained countertop in place can serve for many years, but stone performance still depends on the cabinet structure beneath it.
Granite countertops are commonly secured to wooden cabinet rails with small amounts of flexible silicone or approved adhesive. The cabinet structure supports the stone’s weight, while the adhesive helps prevent movement.
Not always. A 2 cm granite slab often uses plywood or another substrate. A thicker 3 cm slab may sit directly on level base cabinets. The final method should follow the fabricator’s requirements.
Granite is not normally screwed directly into the cabinet. Installers may screw plywood or support structures to the cabinets, but they usually secure the stone itself with silicone, epoxy at seams, and approved support systems.
No. Cabinets should be corrected and leveled before installing granite. Minor differences may be adjusted with suitable shims, but severe unevenness can create gaps, stress points, poor seams, or cracking.
A small overhang may not need visible support. A deep seating overhang usually requires brackets, corbels, legs, or hidden steel. The required support depends on depth, slab thickness, stone type, and cabinet structure.
It is technically possible in some special systems, but it is not the normal method for full granite slabs. Existing countertops may add height, weight, unevenness, and structural uncertainty. Removal and cabinet inspection usually provide a better foundation.
Granite is glued to cabinets in a limited sense, but glue is only one part of the system. The real foundation is a strong, level cabinet structure. When the slab, cabinet, adhesive, seam, sink support, and overhang brackets work together, the finished countertop remains stable and attractive.
Contact our professional stone manufacturing team with your countertop drawings, cabinet layout, slab thickness, sink model, edge design, required quantity, and destination. We can support material selection, custom fabrication, quality inspection, packing, and bulk project delivery.

 English
  French
  German
  Russian
  Arabic