Avoid your inquiry is delay response, please enter your WhatsApp/Skype along with the message, so we can contact you at the very first time.
We will reply you within 24 hours. If for urgent case, please add WhatsApp/WeChat: +8615063007107,. Or call 0086-15063007107 directly.
A muddy garden wastes good space. Rush the job and you get rocking slab, weeds, and puddles. Plan well, build a strong base, and your slab patio will stay solid, safe, and beautiful for years.
To slab a garden, you plan the patio area, measure and mark the paved area, dig out the ground, compact a solid sub-base, add a bedding layer of sharp sand and cement, then lay the paving slabs on a full bed of mortar with a gentle gradient for drainage before jointing and sealing.
As a professional stone manufacturer and supplier, I talk with many contractors who want a simple, reliable way to turn a rough garden into a neat garden patio. In this guide I walk you through each step of a real patio project, using the same clear method our B2B clients follow on site. When you understand the full process, you can choose better paving slab products, cut waste, and build a dream patio that keeps clients happy for years.
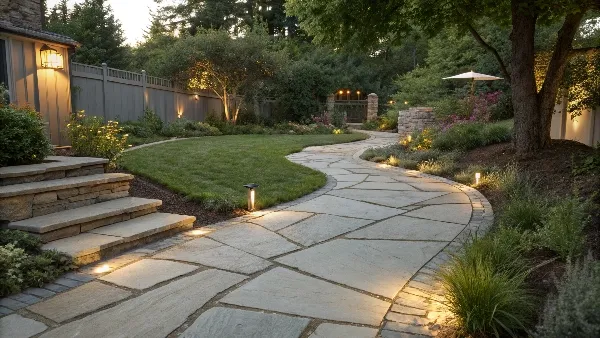
When people ask “How do you slab a garden?”, they usually mean “How do you build a strong, flat patio with stone?” To slab a garden is to build a paved area with each slab set on a firm mortar bed over a well compact sub-base. Done right, the patio feels solid underfoot, with clean joint lines and good drainage.
For us as a stone factory, a slab is not just any stone. A quality slab has the correct thickness of your slabs, strong body, and a flat face that makes laying your paving slab simple. We supply concrete paving slabs, porcelain slabs, and natural stone in bulk for garden patio work around the world. When our partners lay slabs with care, our products show their best look and help them win more jobs and repeat orders.
Because we work on many large sites, we see the difference between a rushed job and a good patio installation. A rushed build often uses a thin layer of sand only, poor mortar mix, and no thought about drainage. A good build uses the correct depth of mot type 1 sub-base, a full bed of mortar, tight jointing compound, and a planned gradient so surface water can move away from the house.
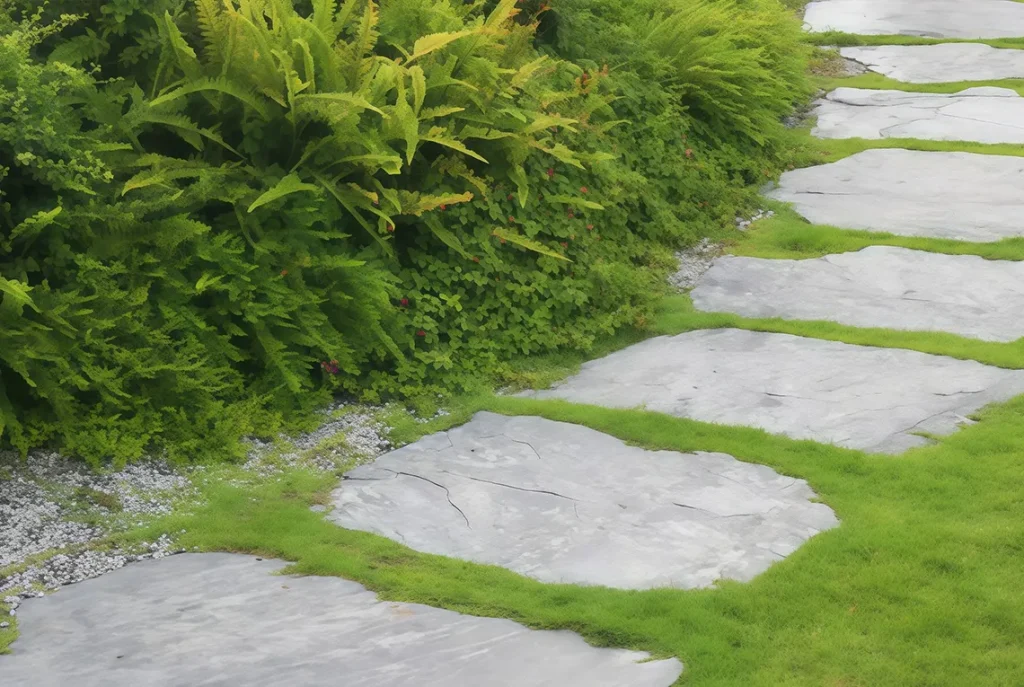
What does it mean to slab a garden patio?
Before you touch a slab, you must plan the patio area. Think about how you will use the space: dining area, path, or full garden patio. Then sketch your paving project on paper with simple lines and sizes. This helps you decide how many patio slabs you need and where to cut them.
Use a tape measure to mark the size on the ground. Put small peg stakes into the ground at each corner and use a string line between them. This string line shows the edge of the new patio and the finished level. A simple plan like this also lets you decide where surface water to run-off so you get proper drainage.
I always tell clients to dry lay a few slabs first. This dry lay test lets you see the pattern, check the gap between each slab, and be sure the layout works with doors, fences, and drains. When you plan like this, you avoid cutting slabs too small at the edges and you save time and money on site.
Even a small garden patio needs the right kit. Here is a simple table of the basics you should prepare before you lay a patio.
| Item | What it is for |
| Slabs / patio slabs | Main surface for your patio paving |
| MOT Type 1 sub-base | Crushed stone to create a stable foundation |
| Sharp sand and cement | To make the mortar mix for the bedding layer |
| Building sand | Sometimes used for jointing sand or fine adjustments |
| Wheelbarrow & rake | Move and level sub-base and sand |
| Rubber mallet & trowel | Adjust slab height and spread mortar |
| Spirit level & straight edge | Check level surface and gradient |
| Garden hose | Lightly wet mix, clean tools, and wash off slurry |
On most projects, we suggest four parts sharp sand to one part cement for the bedding cement mix. This sharp sand and cement mix gives a strong but workable mortar that will hold each slab firmly. For jointing sand and slabs for jointing, you can use a specific jointing compound or a fine sand and cement mix, depending on the style you want.
Contractors also like to use a small cement mixer or other mixer to save time. Mixing by hand in a wheelbarrow is fine for a small paved area, but with big jobs a cement mixer keeps the mortar fresh and even. Always have a good rake and shovel ready so you can move the sub-base and layer of sand quickly when you build up the patio.
The sub-base is the hidden hero of any patio installation. If the sub-base is thin or soft, the slab will move, and slabs may rock or crack. If we are working on a garden with soft soil, we normally dig out the ground to about 150mm below the finished level so we can add enough mot type 1 and a full bedding layer of mortar.
“On every site, a strong sub-base is what keeps the patio flat,” is a simple rule our foreman repeats to every new crew member.
A common build-up for a strong concrete surface looks like this:
The exact depth can change with soil and load, but most guides, like Pavingexpert, agree that compaction of the sub-base is key. Without good compaction of the sub-base, even the best porcelain paving slabs will move over time, and gaps between the slabs will open up.
Once the plan is set, you can dig out the ground inside your peg and string line markers. Remove turf, roots, and loose soil until you reach the depth for your sub-base and mortar bed. Keep the sides neat so your sub-base is held in place and you can create a stable foundation under every slab.
Spread mot type 1 or similar crushed stone over the area. Use a rake to level it out roughly, then compact it with a plate compactor. This compaction of the sub-base locks the stone together and helps surface water to run-off through the gaps. If you skip this step, the slabs may move, so take your time and check levels with a straight edge.
Remember your gradient. For proper drainage, the patio should fall away from the house by about 1 inch in every 60 inches (roughly 1:60). Mark this gradient with stakes into the ground and a string line. If you ensure a level surface side to side with a small fall away from the building, your garden will handle surface water safely and stay clean.
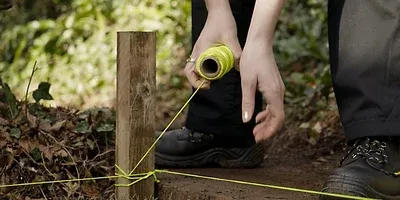
How to dig out the ground and create a stable foundation
Now it is time to mix your mortar. For most garden patios we use a simple mix of sharp sand and cement: four parts sharp sand to one part cement. Many installers write this as “parts sharp sand to one cement” or “sharp sand to one part cement”. You can mix by hand in a wheelbarrow or use a small mixer for a steady mortar mix.
Add just enough water so the mortar mix holds its shape when you pick it up with a trowel. It should not be too wet or the slabs may sink. Spread the mortar bed with the trowel to make a full bed of mortar about 30–40mm thick. This mortar bed should support the whole back of the slab, not just the corners.
For some stones, like porcelain paving, we also apply a priming slurry. When you use a priming slurry or brush priming slurry to the back of each slab, it bonds better to the mortar. On big jobs our teams sometimes use a powered mixer and even a forced-action mixer so every concrete mix or cement mix is the same, which saves time and cuts waste.
Now you can lay the paving slabs. Start from a straight edge near the house or building and lay the slabs down onto the fresh mortar. Press each slab gently, then use a rubber mallet or rubber mallet to tap the surface until it sits firm. Always use a spirit level or using a spirit level on a straight edge to check both level and gradient.
Keep a steady gap between each slab so the joint lines stay true. Many professionals use small plastic spacers to control gaps between slabs. If you lay paving slabs in a running bond or pattern, check each course against the string line and use a spirit level to ensure the fall is correct for patio paving and proper drainage.
When you lay paving slabs made from our stone, we suggest a full mortar bed instead of dots of mortar. This gives full support, spreads the load, and helps every slab stay stable even under heavy garden furniture. For a neat look, check the paved area often and adjust height with the rubber mallet while the mortar is still soft.
After all the slabs are down and the mortar has set, it is time to fill the gaps. You can sweep jointing sand or a special jointing compound into the gaps between slabs, or use a sand and cement joint mix. Lightly spray a garden hose over the joints to help the sand into the gaps and top up until full.
Make sure you fill gaps right down to the mortar. If you leave gaps between your pavers too shallow, water may sit in the joint and freeze in winter. This can crack mortar and chip the edge of a slab. With good joints, surface water can move across the paved area and surface water to run-off into a drain or gravel border.
At the final clean, many contractors wash the concrete surface very lightly so as not to wash out wet joints. For large commercial sites, they might seal concrete paving slabs with a breathable sealer. This keeps the new patio clean for longer, cuts weed growth, and makes future patio installation jobs faster when clients extend the garden.
As a factory supplier, we sell both concrete paving slabs and porcelain paving slabs in bulk. Concrete slabs are strong, cost-effective, and easy to cut when you are cutting slabs to fit odd corners. They suit many paths and classic garden patio projects and work well over a full bed of mortar on a solid sub-base.
Porcelain slabs are very dense, low-porous, and come in many modern styles. Porcelain paving resists stains and scratches, so it is a top choice for high-end patio paving on commercial sites such as cafes or hotel terraces. When you pick paving slabs for your patio, think about slip resistance, style, and long-term cleaning.
For clients who want premium looks, we often propose porcelain paving slabs in key areas and concrete slabs in service zones to manage cost. Because we are a professional stone manufacturer and supplier, we help design the whole paved area layout, choose the right size of slab, and match colours for steps, wall caps, and edges so the whole garden patio looks planned, not pieced together.
Over years of supplying stone for many a patio project, we see the same mistakes again and again. Some DIY builds only use a thin layer of sand and no sub-base, so the slab rocks after one winter. Others forget about drainage, so water sits on the patio area and green algae grows on every slab.
Another common problem is poor mortar. If the mortar mix is too weak, or the installer does not lay the mortar as a full bed, voids form under the slab. Under load the slab may crack at these voids. Using the right sharp sand and cement mix helps create a stable foundation and keeps every slab tight. On our own sites, we always follow a clear cement mix ratio and use a reliable mixer or cement mixer to keep quality high.
The last big mistake is rushing the finish. People often skip cleaning the joints or do not let the concrete mix cure before heavy use. For best results, protect the paved area for at least a couple of days. If heavy rain is forecast, cover the garden patio with sheets so slurry or jointing compound is not washed out before it has set hard.
Common mistakes when you lay slabs
One client, a commercial landlord, came to us with a rough lawn behind a small block of flats. He wanted a safe garden patio for tenants and a tidy look for viewings. The space was about 20 square metres, so not huge, but he wanted long life and low care.
We advised him to dig out the ground to the right depth, use mot type 1, and compact it well. Then we supplied mid-grey concrete slabs and talked his contractor through the right mortar mix of sand to one part cement. Together we planned the layout, the layer of sand, and the joints to ensure a neat patio area with proper drainage and a smooth concrete surface.
The result was a clean patio that tenants could use right away, and the landlord told us the flat marketing photos looked much better. With help from a trusted stone supplier, he turned an empty yard into a neat new patio that added real value. Stories like this show how a well planned patio project and good stone can change a space.
When you lay slabs for a client, the choice of stone is as important as the method. As a professional stone manufacturer and supplier, we control the concrete mix, kiln time, and surface finish of every slab we ship. That means you get consistent colour, clean edges, and accurate size to speed up laying your paving slab.
We also understand the full build-up from sub-base to jointing sand. So when you talk with our team about a new patio or large patio installation, we can advise on mortar bed thickness, bedding layer choices, and even which porcelain paving style fits your project. This kind of partner saves you time on site and helps you avoid costly call-backs.
If you are planning a big paving project or need paving slabs for your patio in bulk, we can bundle steps, edging, and wall stones together. That makes it easier to lay a patio that looks complete. Many contractors, developers, importers and wholesalers now treat us as a long-term partner for stone, knowing we can scale supply as their order book grows.
Here is a short recap of the main steps when you lay a patio in a garden. Think of it as a simple checklist you can use with your team:
With this process and quality stone from a reliable factory, even a first-time installer can turn a rough lawn into a clean, solid patio that lasts.
How thick should slabs be for a garden patio?
For most homes, a slab that is 22–25mm thick is enough when laid on a full mortar bed over a solid sub-base. Heavier use areas, like driveways, may need thicker concrete paving slabs and a deeper sub-base.
Can I just lay slabs on soil?
You should not lay slabs straight onto soil. Soil moves and holds water, so the slab will rock and crack. Always add a compacted sub-base and a strong mortar mix to support the slabs and handle surface water.
Do I need a gradient on my patio?
Yes. A small gradient of about 1 inch over every 60 inches helps proper drainage so water does not sit on the patio. Use stakes, a string line, and a spirit level to ensure the fall is constant.
What mortar mix is best for patio slabs?
We suggest four parts sharp sand to one part cement for most patio slabs. This sharp sand and cement mix gives a strong but workable mortar that sticks to the back of the slab. Always adjust water slowly to avoid a mix that is too wet.
Can I use porcelain paving slabs in a small garden?
Yes. Porcelain paving slabs are great for small spaces because they stay clean and bright. Just be sure to apply a priming slurry to the back and lay them on a solid mortar bed so they do not move or crack.

 English
  French
  German
  Russian
  Arabic